Smart Inbox - Quick Start Guide
Last updated: January 22, 2026
What is Smart Inbox?
Smart Inbox is a tool that helps you respond to patient emails and patient portal messages faster. It connects to your Gmail or Microsoft 365 Work Account, automatically categorizes incoming messages, and generates draft responses you can review, edit, and send with one click.
How it works: Smart Inbox monitors your connected email account for messages from registered patients. When a patient emails you directly from the email address on file in Canvas, that message is automatically pulled into Smart Inbox and linked to their chart. Messages from non-patients or unrecognized email addresses are not captured.
Key benefits:
- Save time — Drafts 2-3 response options for each patient message
- Stay organized — Messages are automatically categorized (appointments, prescriptions, billing, etc.)
- Keep records — Every response is logged to the patient's chart in Canvas
Getting Started (One-Time Setup)
Each provider who wants to use Smart Inbox needs to connect their email account. This is a one-time process.
Visit Smart Inbox app to register
Go to https://smartinbox.practicewithjoy.ai in your browser.
Log in
Click Log In and sign in with your credentials.
Connect your email account
Click Connect Google (for Gmail) or Connect Microsoft 365 Work Account (for Outlook)
A popup will ask you to sign in to your email account
Authorize Smart Inbox to access your inbox
Once connected, you'll see a confirmation message
That's it — Smart Inbox will now automatically receive messages from your patients.
Responding to Patient Messages
Get notified
When a patient message arrives, you'll receive a Canvas task reminding you to respond.
Open the Patient Communication note
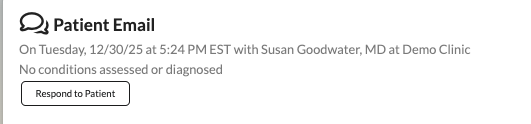
Patient messages appear in Canvas as a Patient Communication note on the patient's chart. The title of the note will either be Patient Email or Patient Portal Message
Click the button "Respond to Patient" at the top of the note to open Smart Inbox and view:
The patient's name and message content
The message category (e.g., Appointments, Prescriptions, Medical Concerns)
2-3 generated draft responses
Choose and send a response
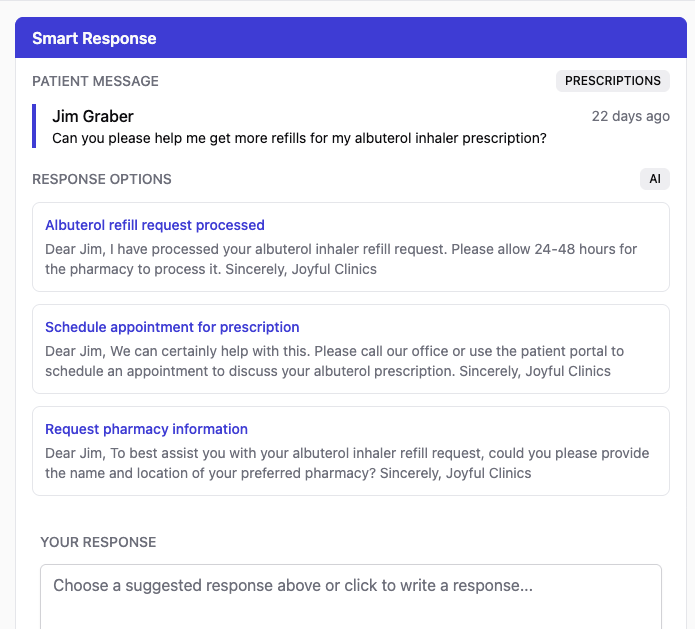
Review the draft responses — each includes a short description so you can quickly scan your options
Select a draft to use as-is, or edit it to add a personal touch
Click Send to deliver your response
Patient receives your reply
To protect patient privacy, your response is not sent directly via email. Instead, the patient receives an email notification that they have a new message from their provider. They can read your full response by logging into the Patient Portal.